


Master Chocolate Moulds: Tips for Perfectly Shaped Treats

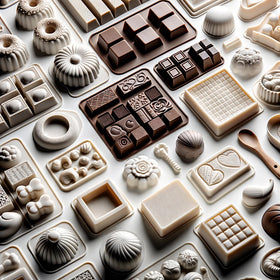
Types of Chocolate Moulds: Silicone vs. Plastic
When it comes to crafting beautifully shaped chocolate treats, the choice of moulds is paramount. Chocolate moulds come primarily in two types: silicone and plastic. Each type has its own set of advantages and considerations, which can significantly affect the final outcome of your confections. Understanding these differences can help you choose the right tool for your chocolate-making endeavors.
Silicone moulds are renowned for their flexibility, making it easier to release chocolates without damaging their intricate designs. They are also non-stick, which means you won't have to worry about your chocolates sticking to the mould. This feature is particularly beneficial when working with delicate designs or when you want to ensure a smooth finish on your chocolates. Silicone moulds are also generally easy to clean, often being dishwasher safe, which adds to their convenience.
On the other hand, plastic moulds tend to offer a more rigid structure, which can be advantageous when creating chocolates with very precise and detailed designs. The rigidity ensures that the shape holds well during the setting process. Plastic moulds are usually transparent, allowing you to see if there are any air bubbles or imperfections that need to be addressed before the chocolate sets. However, they can be less forgiving than silicone moulds when it comes to releasing the chocolates, requiring more care to avoid breakage.
Choosing between silicone and plastic moulds ultimately depends on the type of chocolate treats you aim to create and your personal preferences. If you prioritize ease of use and flexibility, silicone moulds might be your best bet. Conversely, if you need precise shapes and are willing to handle your chocolates more delicately, plastic moulds could be more suitable. Both types have their merits, and many chocolatiers find it useful to have a mix of both in their toolkit to cater to different needs and projects.

Choosing the Right Mould for Your Chocolate Treats
Selecting the appropriate mould for your chocolate treats is a crucial step in ensuring that your finished products look as impressive as they taste. With a plethora of options available, from simple geometric shapes to intricate designs, the right mould can enhance the visual appeal and elevate the overall presentation of your chocolates. Here are some factors to consider when choosing the right mould for your chocolate creations.
First, consider the occasion or theme for which you are making the chocolates. If you are preparing treats for a festive event like Christmas or Easter, themed moulds with holiday-specific designs can add a special touch. For more formal occasions such as weddings or anniversaries, elegant shapes like hearts, flowers, or even custom monograms can make your chocolates stand out. Taking the time to match your moulds to the theme of the event can significantly enhance the aesthetic appeal of your treats.
Another important factor is the size and complexity of the mould. Smaller moulds can be ideal for bite-sized chocolates that are easy to enjoy in one or two bites, while larger moulds may be suitable for more substantial confections that serve as a centerpiece. Consider the level of detail in the mould as well; intricate designs can create stunning chocolates but may require more precision and care during the pouring and setting process. Beginners might find it easier to start with simpler shapes and gradually move to more complex designs as they gain confidence and experience.
Lastly, think about the practicality and functionality of the moulds. Ensure that the moulds you choose are food-safe and made from high-quality materials that can withstand repeated use. It is also helpful to choose moulds that are easy to clean and maintain, as this will save you time and effort in the long run. Some moulds come with additional features such as non-stick coatings or flexible materials that make the chocolate release process smoother. By considering these practical aspects, you can select moulds that not only look great but also make the chocolate-making process more efficient and enjoyable.

Preparing Your Moulds: Essential Tips
Proper preparation of your chocolate moulds is essential for achieving perfectly shaped treats. Taking the time to prepare your moulds correctly can prevent common issues such as sticking, breaking, or uneven surfaces. Here are some essential tips to ensure your moulds are ready for use and can help you achieve the best results.
Before using your moulds, make sure they are thoroughly cleaned and dried. Any residual moisture or debris can cause imperfections in the chocolate and affect the final outcome. Wash your moulds with warm soapy water and dry them completely with a soft cloth or paper towel. For silicone moulds, ensure there are no lingering soap residues, as these can affect the taste and appearance of your chocolates. Plastic moulds may benefit from a gentle buffing with a soft cloth to ensure a smooth surface.
Once your moulds are clean and dry, consider lightly coating them with a thin layer of cocoa butter or a non-stick spray specifically designed for chocolate making. This step can help prevent the chocolate from sticking to the mould and make it easier to release the finished treats. Be sure to apply the coating evenly and use a minimal amount to avoid affecting the flavor or texture of the chocolates. If you prefer not to use a coating, ensure your moulds are naturally non-stick or have been conditioned through prior use.
Temperature control is another critical aspect of mould preparation. Ensure that your moulds are at room temperature before pouring in the melted chocolate. Moulds that are too cold or too hot can cause the chocolate to set unevenly or develop unwanted bloom, which is a whitish coating that can form on the surface. To achieve optimal results, store your moulds in a cool, dry place and avoid exposing them to extreme temperature changes. By carefully preparing your moulds, you can create beautifully shaped chocolates with a smooth, professional finish.

Melting Chocolate: Techniques for Success
Melting chocolate correctly is a pivotal step in the chocolate-making process. Achieving the right consistency and temperature ensures that your chocolate will set properly and have a glossy, smooth finish. There are several techniques for melting chocolate, each with its own advantages. Understanding these methods can help you choose the best approach for your needs and ensure successful results.
One of the most popular methods for melting chocolate is the double boiler technique. This involves placing a heatproof bowl over a pot of simmering water, ensuring that the bottom of the bowl does not touch the water. The gentle, indirect heat helps to melt the chocolate evenly without scorching it. Stir the chocolate continuously to promote even melting and prevent any clumps from forming. This method is particularly effective for larger quantities of chocolate and allows for better control over the melting process.
Another common technique is microwave melting. This method is quick and convenient, making it a popular choice for small batches of chocolate. To melt chocolate in the microwave, place the chopped chocolate in a microwave-safe bowl and heat it in short bursts, usually 15-20 seconds at a time. Stir the chocolate between each interval to ensure even melting and prevent overheating. Be cautious with microwave melting, as chocolate can burn easily if left unattended or heated for too long.
For those who prefer a more hands-off approach, using a chocolate melter or tempering machine can be an excellent option. These appliances are designed specifically for melting and tempering chocolate, providing precise temperature control and reducing the risk of burning or overheating. While these machines can be an investment, they are particularly useful for serious chocolatiers or those who frequently work with large quantities of chocolate. No matter which method you choose, paying attention to temperature and consistency is key to achieving perfectly melted chocolate.

Pouring and Setting Chocolate: Best Practices
Pouring and setting chocolate properly is essential for creating beautifully shaped and smooth treats. This process requires a steady hand and attention to detail to ensure that your chocolates turn out perfectly every time. By following best practices for pouring and setting chocolate, you can achieve professional-looking results that are sure to impress.
When pouring melted chocolate into your prepared moulds, it is important to work quickly and efficiently. Chocolate can begin to set as soon as it starts cooling, so having all your tools and materials ready before you start is crucial. Use a ladle or small spoon to carefully pour the chocolate into each cavity of the mould. For more precise control, you can use a piping bag or squeeze bottle to fill the moulds, especially if you are working with intricate designs or smaller moulds.
After pouring the chocolate, gently tap the mould on the countertop to release any air bubbles that may have formed. Air bubbles can create unsightly holes or imperfections in the finished chocolates, so it is important to remove them before the chocolate sets. You can also use a toothpick or skewer to pop any visible bubbles on the surface. Ensuring that the chocolate fills every corner of the mould evenly will help you achieve a smooth and flawless finish.
Once the chocolate is poured and the air bubbles are removed, the next step is to allow the chocolate to set properly. Place the filled moulds in a cool, dry place to set at room temperature. Avoid placing the moulds in the refrigerator or freezer, as rapid cooling can cause the chocolate to contract too quickly and develop bloom. Depending on the type of chocolate and the size of the moulds, the setting process can take anywhere from a few hours to overnight. Be patient and allow the chocolate to set completely before attempting to remove it from the moulds. By following these best practices, you can create perfectly shaped chocolates with a smooth and professional finish.

Decorating Your Chocolate Treats: Creative Ideas
Once your chocolates have been perfectly shaped and set, the next step is to decorate them to enhance their visual appeal. Decorating your chocolate treats allows you to add a personal touch and make them truly unique. There are countless creative ideas for decorating chocolates, from simple techniques to more elaborate designs. Here are some ideas to inspire you and help you take your chocolate treats to the next level.
One of the simplest and most effective ways to decorate chocolates is by using edible decorations such as sprinkles, nuts, or dried fruits. These can be added to the chocolate before it sets, allowing them to adhere to the surface and create a textured look. You can also use edible glitter or luster dust to add a touch of sparkle and shine to your chocolates. For a more sophisticated look, consider using gold or silver leaf, which can be applied to the surface of the chocolates for a luxurious finish.
Another popular decorating technique is drizzling or piping additional chocolate onto the surface of your treats. This can be done using contrasting colors of chocolate, such as white chocolate drizzled over dark chocolate, to create striking patterns and designs. You can use a piping bag or a squeeze bottle to control the flow of the chocolate and create intricate designs. For a more artistic approach, you can use a small brush to paint designs or patterns onto the surface of the chocolates.
For those who want to take their decorating skills to the next level, consider using moulded decorations or transfers. These can be made by melting and shaping chocolate into various designs, such as flowers, leaves, or geometric shapes, and then attaching them to the surface of the chocolates. Transfers are sheets with printed designs made from colored cocoa butter, which can be applied to the surface of the chocolates to create detailed and professional-looking designs. By experimenting with different decorating techniques and materials, you can create stunning chocolate treats that are as visually impressive as they are delicious.

Common Mistakes to Avoid with Chocolate Moulds
Working with chocolate moulds can be a rewarding experience, but it also comes with its own set of challenges. Even the most experienced chocolatiers can encounter issues that affect the final outcome of their treats. Understanding common mistakes and how to avoid them can help you achieve better results and ensure that your chocolates turn out perfectly every time. Here are some common mistakes to watch out for when using chocolate moulds.
One of the most common mistakes is not properly preparing the moulds before use. Skipping the cleaning and drying process can result in chocolates that stick to the mould or have imperfections on the surface. Always ensure that your moulds are thoroughly cleaned and dried before pouring in the chocolate. Additionally, consider lightly coating the moulds with cocoa butter or a non-stick spray to facilitate easy release and achieve a smooth finish.
Another frequent issue is improper melting and tempering of the chocolate. Chocolate that is not melted or tempered correctly can develop bloom, which is a whitish coating that forms on the surface. This can happen if the chocolate is overheated, not stirred enough, or not cooled properly. Always monitor the temperature of the chocolate carefully and use a reliable thermometer to ensure that it stays within the optimal range. Taking the time to properly melt and temper the chocolate can make a significant difference in the final appearance and texture of your treats.
Lastly, rushing the setting process can lead to unsatisfactory results. Allowing the chocolate to set too quickly, such as by placing it in the refrigerator or freezer, can cause it to contract and develop bloom. It is important to let the chocolate set at room temperature in a cool, dry place. Be patient and give the chocolate enough time to set completely before attempting to remove it from the moulds. By avoiding these common mistakes and taking the time to follow best practices, you can create beautifully shaped and smooth chocolates that are sure to impress.

Cleaning and Maintaining Your Chocolate Moulds
Proper cleaning and maintenance of your chocolate moulds are essential for ensuring their longevity and continued performance. Well-maintained moulds can help you achieve consistent results and prevent issues such as sticking or uneven surfaces. By following a few simple steps, you can keep your moulds in excellent condition and ready for your next chocolate-making project.
After each use, it is important to clean your moulds thoroughly to remove any residual chocolate or debris. For silicone moulds, wash them with warm soapy water and use a soft brush or sponge to gently scrub away any remaining chocolate. Rinse the moulds thoroughly to remove all soap residues and dry them completely with a soft cloth or paper towel. Silicone moulds are often dishwasher safe, but check the manufacturer's instructions to be sure.
Plastic moulds require a bit more care during the cleaning process. Avoid using abrasive sponges or brushes, as these can scratch the surface of the mould and affect the quality of your chocolates. Instead, use a soft cloth or sponge with warm soapy water to clean the moulds gently. Rinse thoroughly and dry completely before storing. If you notice any stubborn chocolate residue, you can use a mixture of warm water and white vinegar to help break it down and remove it.
Proper storage is also crucial for maintaining your chocolate moulds. Store them in a cool, dry place away from direct sunlight and extreme temperatures. Keeping the moulds flat and avoiding stacking them can help prevent warping or damage. If you have limited storage space, consider placing a sheet of parchment paper between each mould to protect the surfaces. By taking the time to clean and store your moulds properly, you can ensure that they remain in top condition and ready for your next chocolate-making adventure.
Conclusion: Elevate Your Chocolate Crafting Skills
Mastering the art of using chocolate moulds can significantly elevate your chocolate crafting skills and allow you to create beautifully shaped and delicious treats. From choosing the right moulds and preparing them properly to melting, pouring, and decorating your chocolates, each step plays a crucial role in achieving the perfect result. By understanding the nuances of working with chocolate moulds and following best practices, you can avoid common mistakes and create professional-quality chocolates that are sure to impress.
Whether you are a beginner or an experienced chocolatier, the tips and techniques outlined in this guide can help you refine your skills and achieve better results. Experiment with different types of moulds, try out new decorating ideas, and take the time to properly prepare and maintain your moulds. With practice and attention to detail, you can unlock the full potential of chocolate moulds and create stunning treats that are as visually appealing as they are delicious.
As you continue to explore the world of chocolate-making, don't be afraid to push the boundaries and try new things. The possibilities are endless, and each new project offers an opportunity to learn and grow. By embracing the art of chocolate crafting and mastering the use of moulds, you can elevate your confections to new heights and delight your friends, family, and customers with perfectly shaped and beautifully decorated chocolates.
In This Collection

Wide Spatula for Chocolate
Original price
$35.00 CAD
Original price
$35.00 CAD
-
Original price
$35.00 CAD
Original price
$35.00 CAD
Current price
$19.99 CAD
$19.99 CAD
-
$19.99 CAD
Current price
$19.99 CAD
Wide stainless steel spatula with a heavy duty black polypropylene handle. With its 20 cm (8") wide S/S blade, this spatula is ideal for scraping c...
View full details
Original price
$35.00 CAD
Original price
$35.00 CAD
-
Original price
$35.00 CAD
Original price
$35.00 CAD
Current price
$19.99 CAD
$19.99 CAD
-
$19.99 CAD
Current price
$19.99 CAD
Save 43%
3cm Half-Sphere Chocolate Mold
Original price
$30.00 CAD
Original price
$30.00 CAD
-
Original price
$30.00 CAD
Original price
$30.00 CAD
Current price
$24.49 CAD
$24.49 CAD
-
$24.49 CAD
Current price
$24.49 CAD
Out of stock
The Half Spheres Chocolate Mould is a great way to craft chocolate balls or candy balls, simply by using two moulds. The mould offers precision scu...
View full details
Original price
$30.00 CAD
Original price
$30.00 CAD
-
Original price
$30.00 CAD
Original price
$30.00 CAD
Current price
$24.49 CAD
$24.49 CAD
-
$24.49 CAD
Current price
$24.49 CAD
Sold out

Hot Chocolate Bomb Mold
Original price
$15.00 CAD
Original price
$15.00 CAD
-
Original price
$15.00 CAD
Original price
$15.00 CAD
Current price
$9.99 CAD
$9.99 CAD
-
$9.99 CAD
Current price
$9.99 CAD
This Half Sphere Thermoformed Plastic Mould is the perfect mold to make Hot Chocolate Bombs.Available in various sizes from 4 to 20 cm (1.6" to 7.9...
View full details
Original price
$15.00 CAD
Original price
$15.00 CAD
-
Original price
$15.00 CAD
Original price
$15.00 CAD
Current price
$9.99 CAD
$9.99 CAD
-
$9.99 CAD
Current price
$9.99 CAD
Save 33%
Diamond Truffle Chocolate Mould
Original price
$30.00 CAD
Original price
$30.00 CAD
-
Original price
$30.00 CAD
Original price
$30.00 CAD
Current price
$24.49 CAD
$24.49 CAD
-
$24.49 CAD
Current price
$24.49 CAD
Out of stock
The Diamond Chocolate Mould is a great way to craft chocolate diamond truffles. Each cavity has a diameter of 31mm and a depth of 20mm and will giv...
View full details
Original price
$30.00 CAD
Original price
$30.00 CAD
-
Original price
$30.00 CAD
Original price
$30.00 CAD
Current price
$24.49 CAD
$24.49 CAD
-
$24.49 CAD
Current price
$24.49 CAD
Sold out
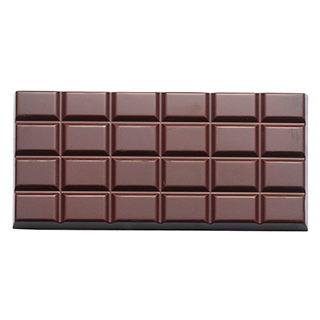
100g Classic Bar Chocolate Mould
Original price
$32.00 CAD
Original price
$32.00 CAD
-
Original price
$32.00 CAD
Original price
$32.00 CAD
Current price
$26.85 CAD
$26.85 CAD
-
$26.85 CAD
Current price
$26.85 CAD
Out of stock
The polycarbonate 100g Classic Bar Chocolate Mould is an ideal way to craft classical looking chocolate bars using your choice of chocolate or conf...
View full details
Original price
$32.00 CAD
Original price
$32.00 CAD
-
Original price
$32.00 CAD
Original price
$32.00 CAD
Current price
$26.85 CAD
$26.85 CAD
-
$26.85 CAD
Current price
$26.85 CAD
Sold out
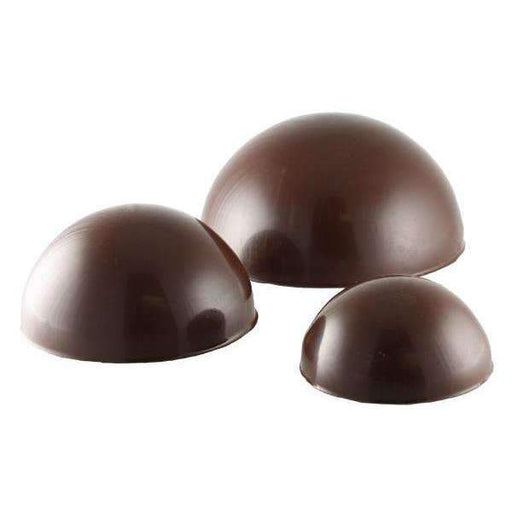
Half-Sphere Thermoformed Mould
Original price
$15.00 CAD
Original price
$15.00 CAD
-
Original price
$15.00 CAD
Original price
$15.00 CAD
Current price
$9.99 CAD
$9.99 CAD
-
$9.99 CAD
Current price
$9.99 CAD
The Half Sphere Thermoformed Mould is a great way to craft chocolate ball, entremet and mousse cake. The mould offers precision and polished half s...
View full details
Original price
$15.00 CAD
Original price
$15.00 CAD
-
Original price
$15.00 CAD
Original price
$15.00 CAD
Current price
$9.99 CAD
$9.99 CAD
-
$9.99 CAD
Current price
$9.99 CAD
Save 33%
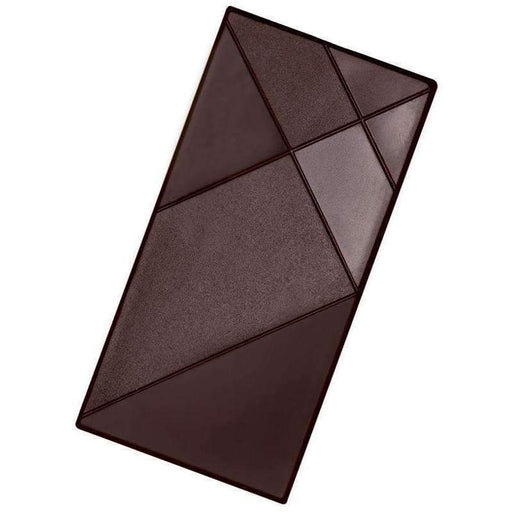
70g Cacao Collective Tablet Bar Chocolate Mould
Original price
$38.00 CAD
Original price
$38.00 CAD
-
Original price
$38.00 CAD
Original price
$38.00 CAD
Current price
$33.79 CAD
$33.79 CAD
-
$33.79 CAD
Current price
$33.79 CAD
Out of stock
The 70g cacao collective tablet Bar Chocolate Mould is an ideal way to craft classical looking chocolate bars using your choice of chocolate or con...
View full details
Original price
$38.00 CAD
Original price
$38.00 CAD
-
Original price
$38.00 CAD
Original price
$38.00 CAD
Current price
$33.79 CAD
$33.79 CAD
-
$33.79 CAD
Current price
$33.79 CAD
Sold out
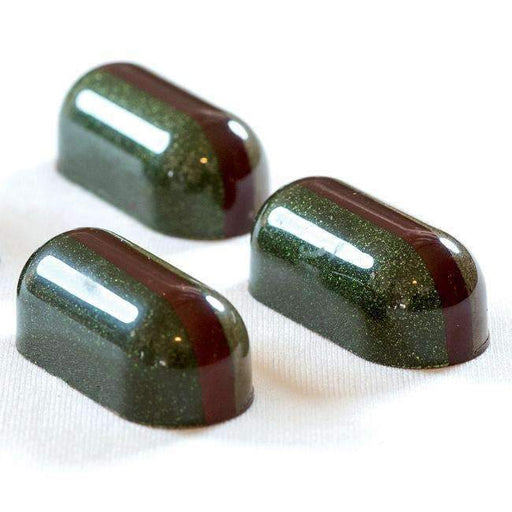
Rounded Oval Chocolate Mould
Original price
$35.00 CAD
Original price
$35.00 CAD
-
Original price
$35.00 CAD
Original price
$35.00 CAD
Current price
$28.99 CAD
$28.99 CAD
-
$28.99 CAD
Current price
$28.99 CAD
Out of stock
This high quality Rounded Oval Chocolate Mold designed by Antonio Bachour is made from heavy duty polycarbonate plastic. Made with a smooth finish,...
View full details
Original price
$35.00 CAD
Original price
$35.00 CAD
-
Original price
$35.00 CAD
Original price
$35.00 CAD
Current price
$28.99 CAD
$28.99 CAD
-
$28.99 CAD
Current price
$28.99 CAD
Sold out
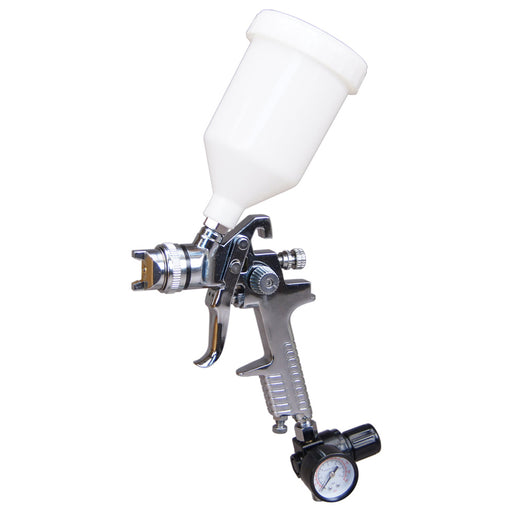
HVLP Chocolate Air Spray Gun
Original price
$125.00 CAD
Original price
$125.00 CAD
-
Original price
$125.00 CAD
Original price
$125.00 CAD
Current price
$99.99 CAD
$99.99 CAD
-
$99.99 CAD
Current price
$99.99 CAD
The HVLP chocolate gravity gun is designed for minimal overspray and high production. Low overspray is achieved by converting compressor air to Hig...
View full details
Original price
$125.00 CAD
Original price
$125.00 CAD
-
Original price
$125.00 CAD
Original price
$125.00 CAD
Current price
$99.99 CAD
$99.99 CAD
-
$99.99 CAD
Current price
$99.99 CAD
Save 20%
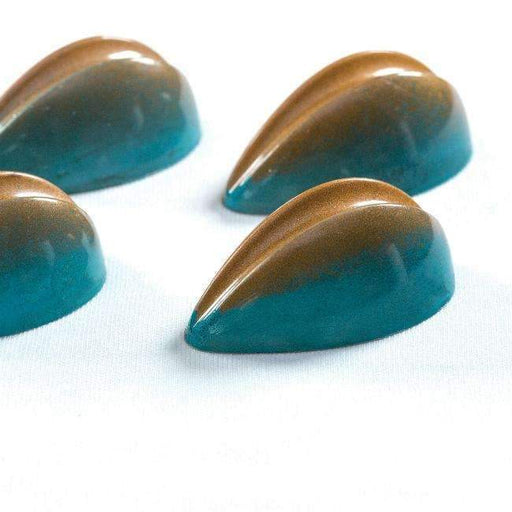
Oval Slide Chocolate Mould
Original price
$35.00 CAD
Original price
$35.00 CAD
-
Original price
$35.00 CAD
Original price
$35.00 CAD
Current price
$28.99 CAD
$28.99 CAD
-
$28.99 CAD
Current price
$28.99 CAD
Only 6 left!
This high quality Oval Slide Chocolate Mold designed by Antonio Bachour is made from heavy duty polycarbonate plastic. Made with a smooth finish, i...
View full details
Original price
$35.00 CAD
Original price
$35.00 CAD
-
Original price
$35.00 CAD
Original price
$35.00 CAD
Current price
$28.99 CAD
$28.99 CAD
-
$28.99 CAD
Current price
$28.99 CAD
Save 17%
Leave a comment