
The Most Fool-Proof Macarons You'll Ever Make - Tasty
Macarons are one of the most popular but also most challenging desserts to get right. We spent many months and made dozens of batches and the pursuit of trying to find a recipe and some foolproof techniques to help you do it right the first time.
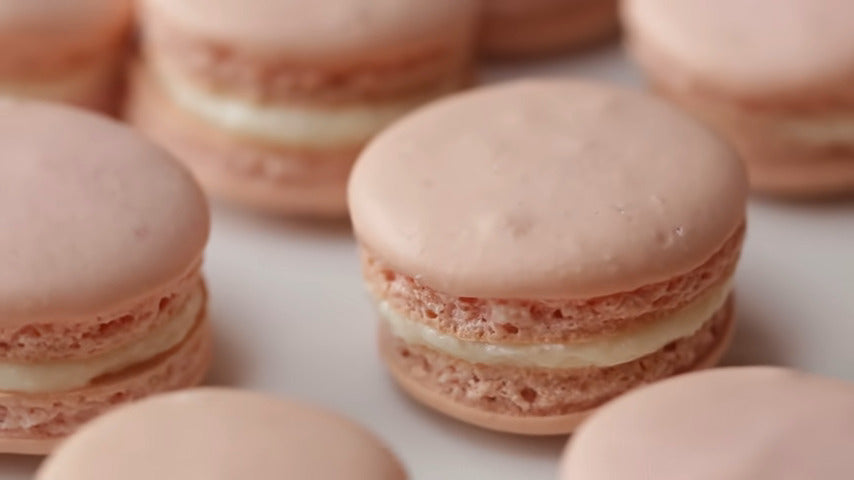
A perfect macaron should be chewey on the inside and crispy on the outside. They should have those classic feet and a smooth top; first things first, you want to let the egg whites come to room temperature for at least 30 minutes before you get started.
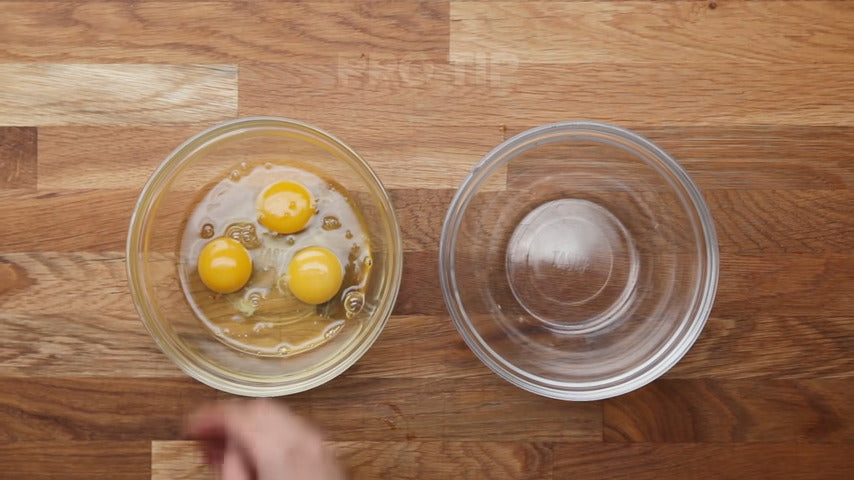
Having the egg whites rest is going to result in a much fluffier airier meringue. So protip: a really easy way to separate your whites from your yolks is to actually use your hands. (You can use the egg separator like this one here. Egg Separator)
You can alternate between eggshells but you risk puncturing the egg yolk, you could get some shell in it. It’s actually more time-consuming if you wash your hands - this is a really easy way to go.
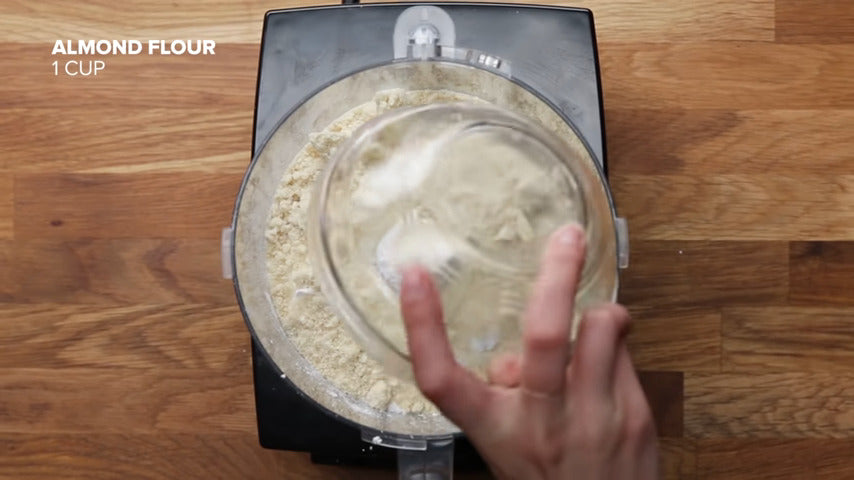
Now we can move on to our dry ingredients; so you want your dry ingredients to be really really fine to ensure that smooth top, this is the time to break out your food processor if you have one.
So we're gonna add our dry ingredients to a food processor. We'd recommend pulsing it at least 10 times but you really can't go too far here. The finer the dry ingredients the smoother your top is gonna be even if you buy extra fine almond flour it's not gonna be that smooth you might get a bit of a lumpy surface.
If you don't have a food processor fear not, your macarons can still be delicious they might just be a little lumpier on top. Another tip to get that really smooth surface is to sift your dry ingredients a few times after you've pulsed it in the food processor.
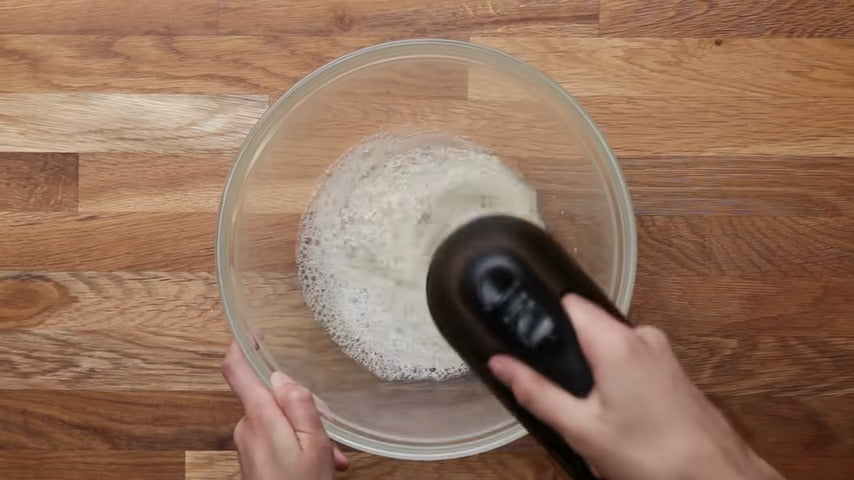
This is just going to ensure a really smooth top so you can get those picture-perfect macarons. Now we're gonna move on to our wet ingredients and start off by beating the egg whites with a pinch of salt that's just gonna help stabilize them. You also want to use the whisk attachment to help beat some extra air into your meringue.

So you're gonna beat the egg whites just until they get really frothy and are no longer translucent, just like this. That's when you want to start adding the sugar really gradually if you add too much sugar at once it's gonna deflate all that beautiful air that you just whipped into the meringue.
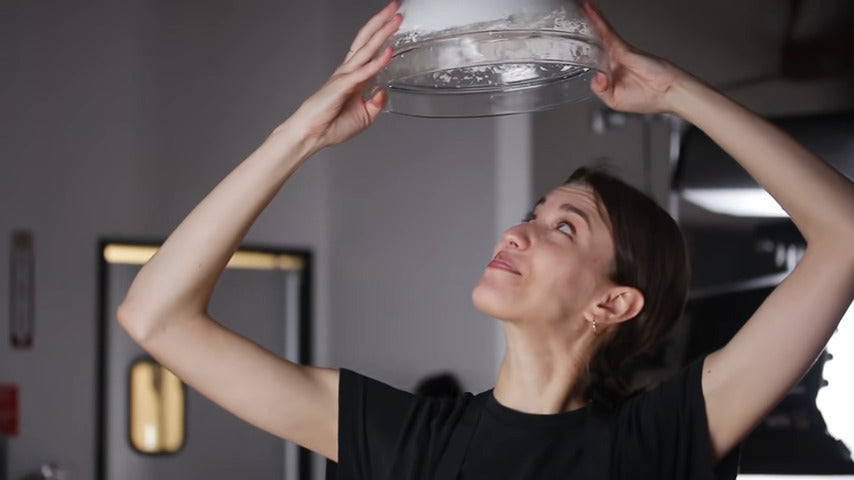
Once all the sugars added keep feeding until you get stiff peaks. If your peaks are falling over like this, you still need to keep going. Once they're really stiff like this you're all set. So if your peaks are stiff enough you can actually flip a bowl upside down without anything falling out.
Once your meringue is good to go you're gonna add the vanilla extract, you don't want to do this too early or you're not gonna get those really big beautiful stiff peaks, and lastly, we're gonna add our food coloring.
We'd recommend using gel food coloring because it gives you much more vibrant color. Using a liquid food coloring is gonna thin your batter out and it's gonna fade during baking. It's really subtle but you can see here how the one with liquid food coloring actually looks more peachy than pink. Now we're ready to combine the wet and dry ingredients.
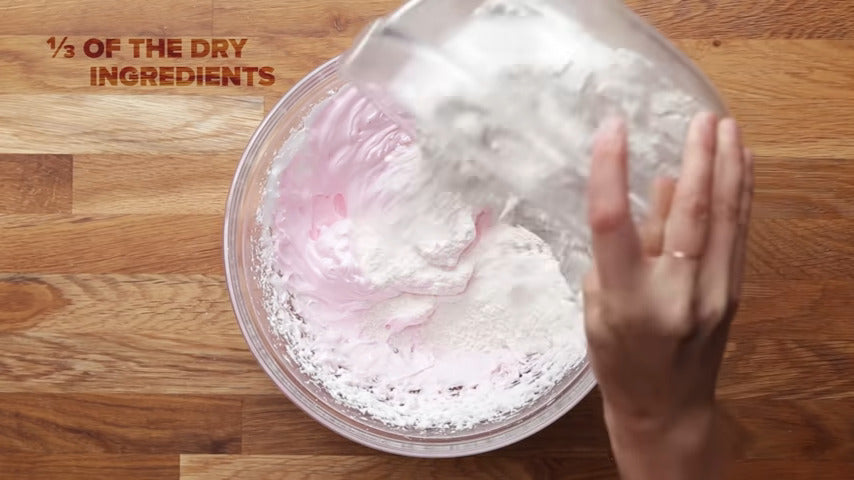
So first add a third of the dry ingredients to the meringue. Now we're going to macro nosh that's the technique of folding the dry ingredients into the meringue.
Traditionally you gently fold ingredients together 35 to 40 times but we found that you actually want to be really aggressive to beat out any remaining air bubbles that'll help you get a really consistent cookie.
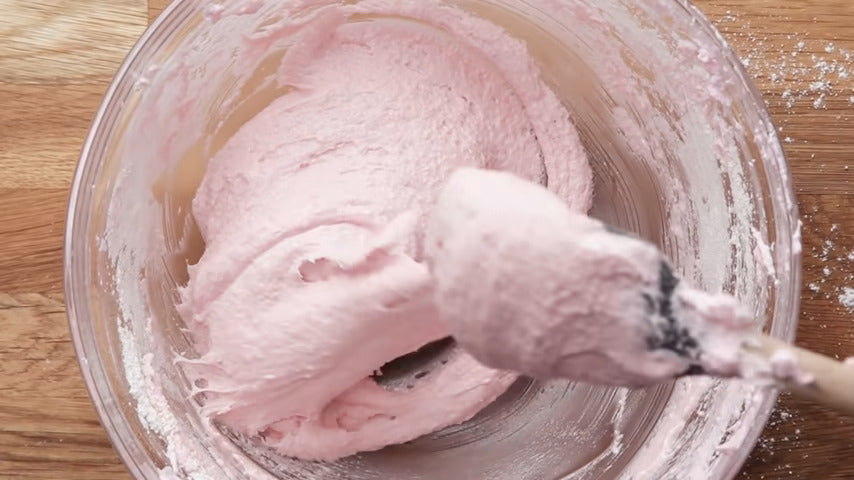
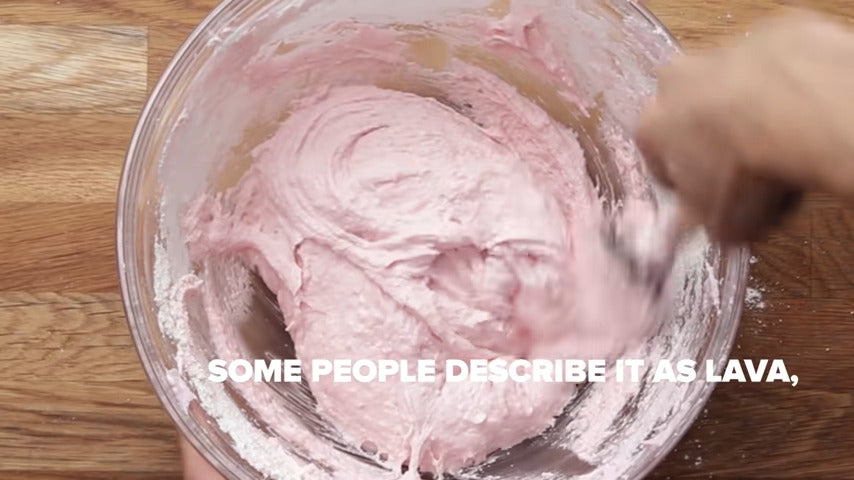
So there's not an exact number of times that you need to fold the batter, it's really just something you want to keep an eye on. Ultimately, at the end of the day, the texture should look like wet sand ribbons.
Some people describe it as lava but how many of us have really seen lava. A tried-and-true test is to do the figure 8 method one of the biggest mistakes people make is either under mixing or over mixing their batter. Use High Heat Spatula for better mixing.
Once it's all incorporated go really slowly and keep practicing that figure 8 until you've got it. That'll really ensure that you don't go too far. Once you can make a figure 8 with the batter without a breaking you're good to go stop here and do not keep mixing.
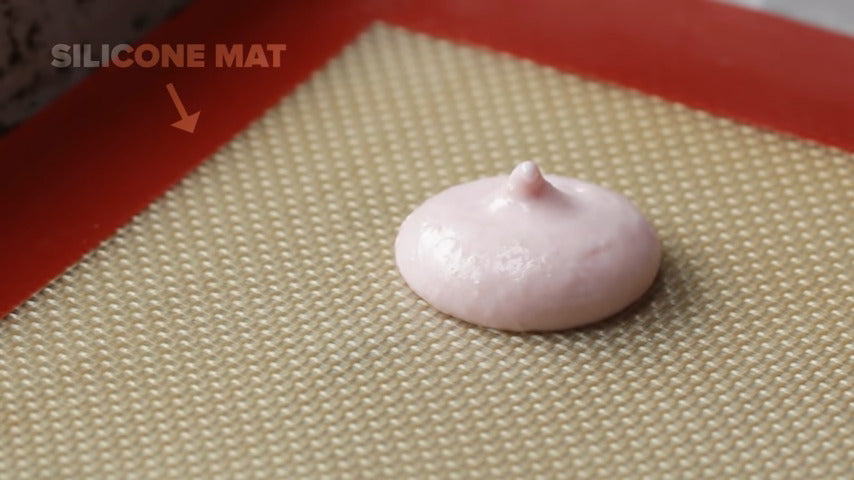
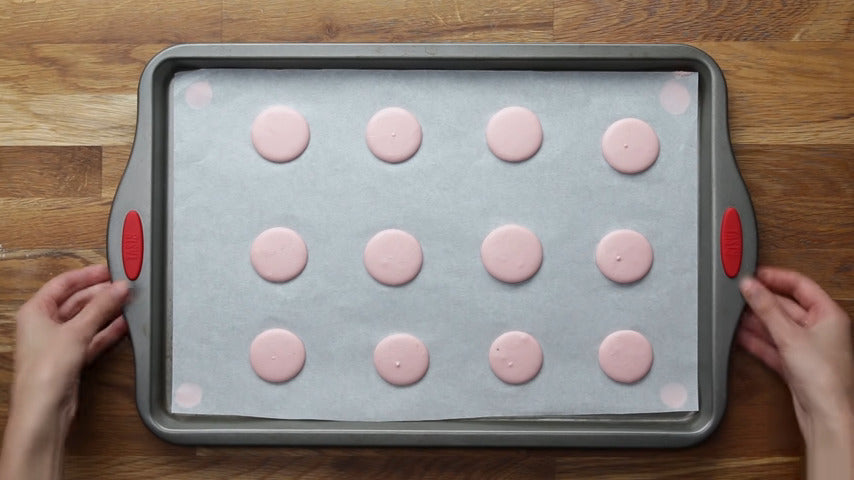
Now that the batter is ready we're ready to start piping our macarons. Fill a piping bag with the round tip, put four dots of the batter in each corner of your baking sheet then place the parchment paper on top.
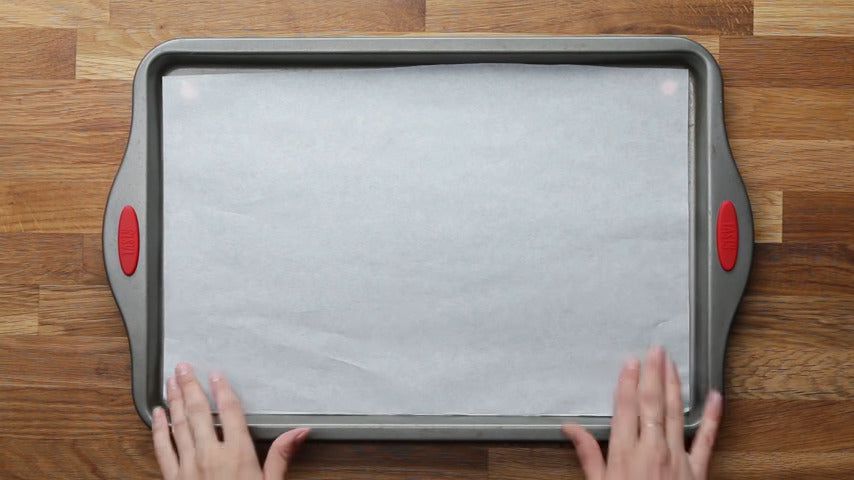
This is gonna help secure the parchment paper so it's not gonna slide all around as you're packing a lot of recipes call for silicone mats but after numerous tests we found that they can actually make the cookies a little moist parchment paper will really dry your macarons out which is what you want.
This was one of my personal biggest revelations during testing. The classic size of a macaron is about an inch and a half wide. You can buy a template for piping but you can also just eyeball it as we did.
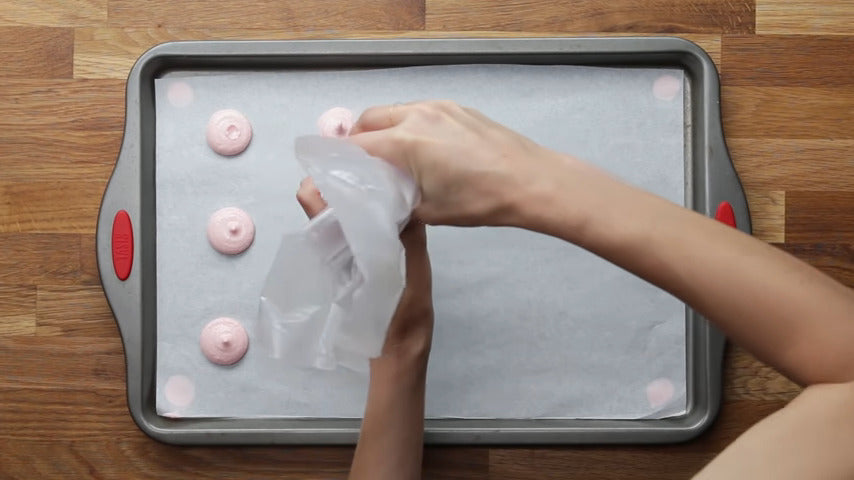
Once the macarons are piped it's time to drop the tray. Make sure you do not skip this step, dropping the tray is gonna help eliminate any air bubbles. It also is going to ensure that you've got a really smooth surface on top.
Let the macarons rest at room temperature for 30 minutes to an hour. The macarons are gonna get this kind of weird film on top and you can actually brush your finger back and forth after an hour and see that it's not gonna indent - that's the sign that they're ready to go.
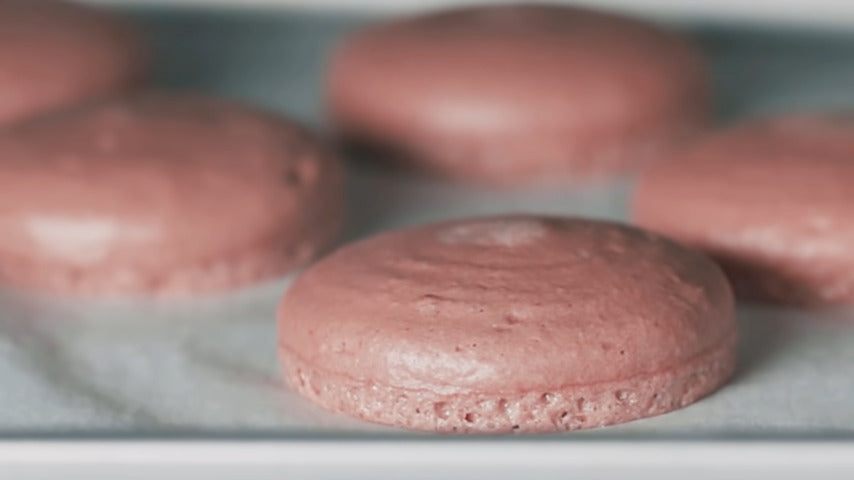
If you don't do this stuff the macarons aren't gonna rise properly and you won't get this classic feat in our case when we tested it the feet grew outward instead of upward. Now you want to bake the macarons at 300 degrees for 17 minutes. If you have an oven thermometer this is a really good time to use it.
Make sure your ovens are not running too hot or too cold (use this oven thermometer) or the macarons aren't gonna come outright. As without baking don't open the oven door, if you do you could deflate the macarons. If your macarons are sticking to the parchment paper after this it just means they're a little underbaked.
Baking Mats and Pans can be found here:
You can just pop them back in the oven for a minute or two. When you take the macarons out of the oven and let them cool in the baking sheet for 15 to thirty minutes when they're done they should lift right off the parchment just like this.
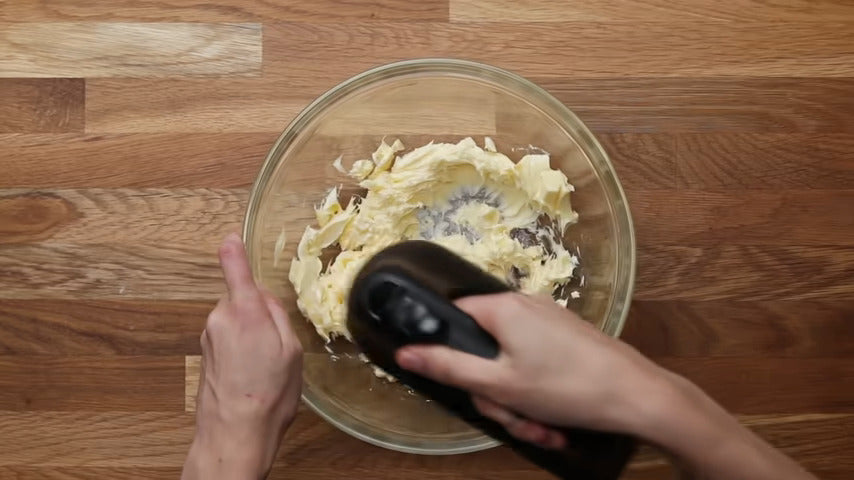
Transfer the macarons to a wire rack to fully dry out and cool before filling if you don't all your feelings just gonna melt all over them. So while our macarons dry out we're gonna work on our filling. We're gonna go with really classic vanilla buttercream and we'll talk about ways that you can get a little fancy with your fillings, a bit later on.
So first you're gonna cream your room-temperature butter once it's really beautiful and fluffy just like this you're gonna sift your powdered sugar into the bowl. You don't have to sift it but this will just result in a really smooth creamy buttercream.
Once everything's combined, add the vanilla then you can add one or two tablespoons of heavy cream and mix until it's incorporated. We need to add a little more cream and you can just do this a tablespoon at a time until it's the right consistency.
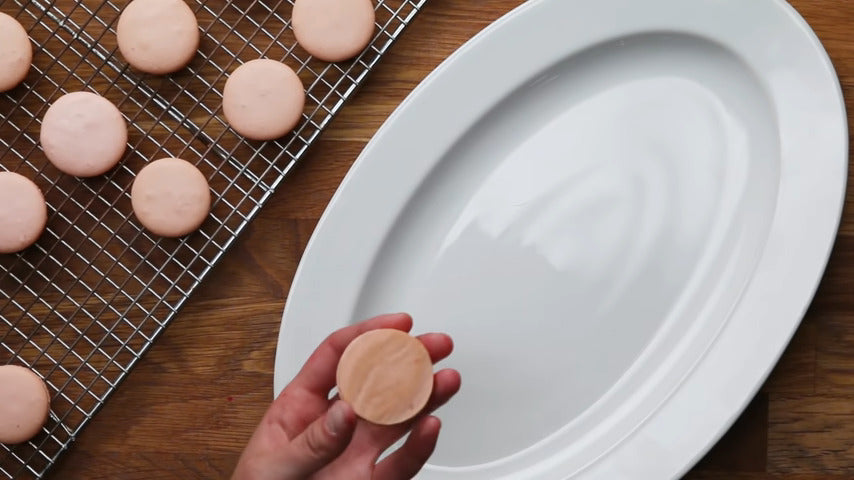
Now that the buttercream is done, added to a piping bag again fitted with a round tip. Filling the cookies is pretty straightforward, just pipe a dollop onto the cookie that's a little smaller than the size of the actual cookie then press two sides together and you're good.
Now the part that takes the most patients out of this entire process is that we actually recommend that you wait at least 24 hours before eating your macarons. This will help them develop the best flavor and texture.
You may be tempted to eat one right away and you know if you do we won't tell but really it's worth your while to let them rest. Once you feel like you've mastered the basic macaron, feel free to get creative.
When you're starting out the easiest way to customize your macarons is by playing around with food coloring and the flavor of your filling. You could flavor your buttercream, you can make a chocolate ganache, or lemon curd - the possibilities are truly endless.
And those are the basics of how to get started making macarons, they can be pretty intimidating and honestly really easy to mess up, if you don't know what you're doing. But if you follow our tried-and-true tips you'll be able to master the techniques needed to nail perfect macarons every time. From here you really just need to try it.
How many did you make? I think I made probably over 2,000 macarons. You know they take a lot of time, they take patience - if you make a macaron right, you've won life.
You can also watch this video on their Youtube Channel: Tasty
Leave a comment