
Quick and Easy FONDANT ROSES Tutorial - Yeners Cake Tips
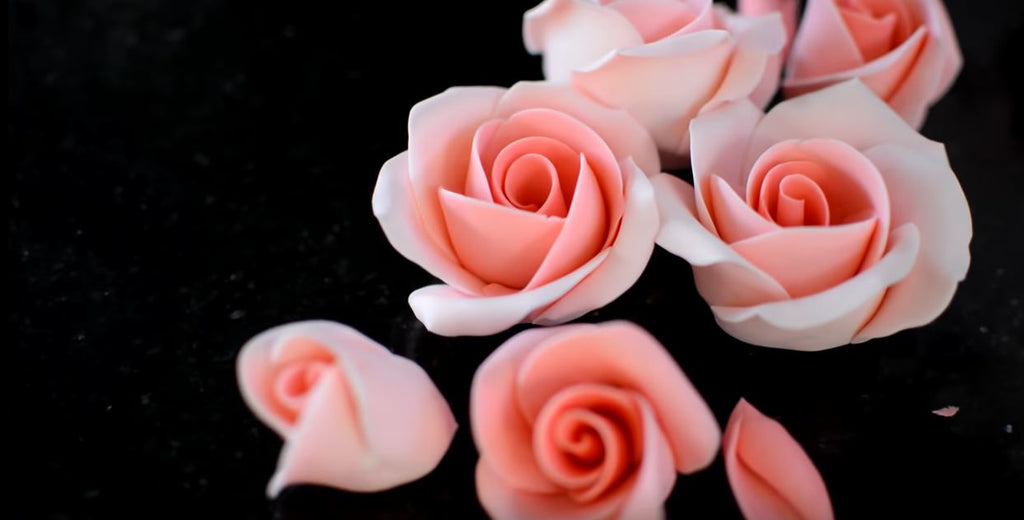
Hi, guys. Over forty years I’m decorating cakes. And if you ask me the question: “What is the most commonly used ornament in the cake decorating business?” I would say easily: Roses! So I’d like to show you today my way of making roses in just a couple of minutes without using any special equipment.
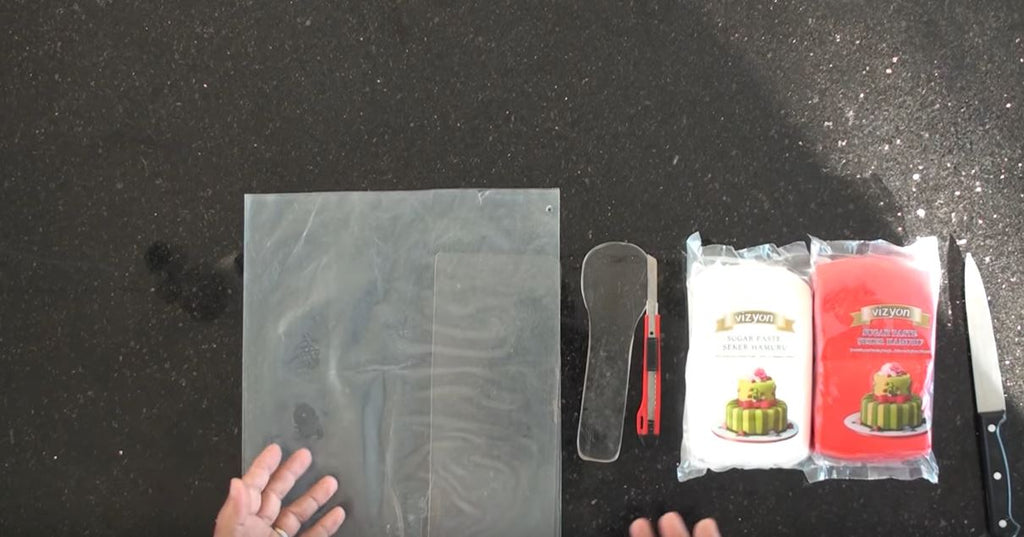
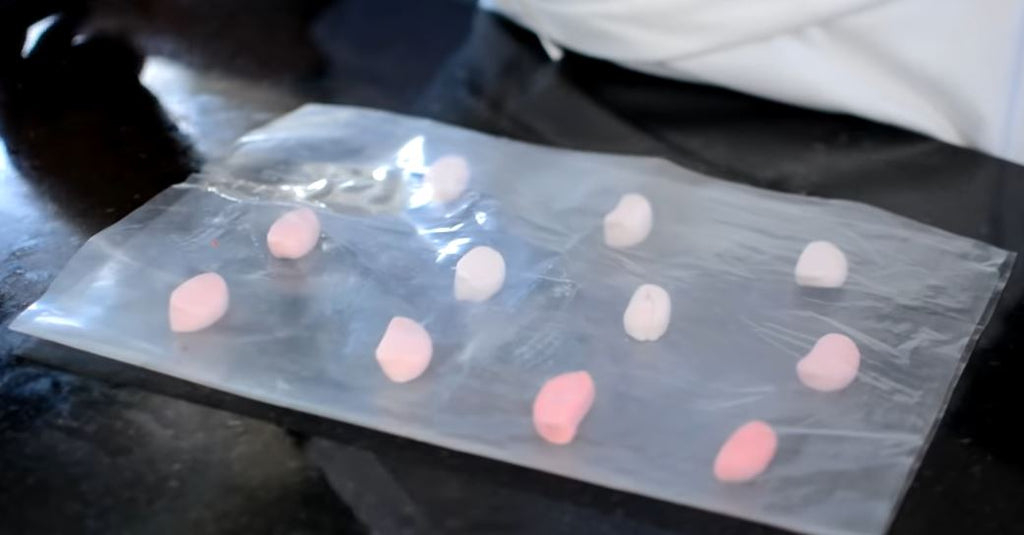
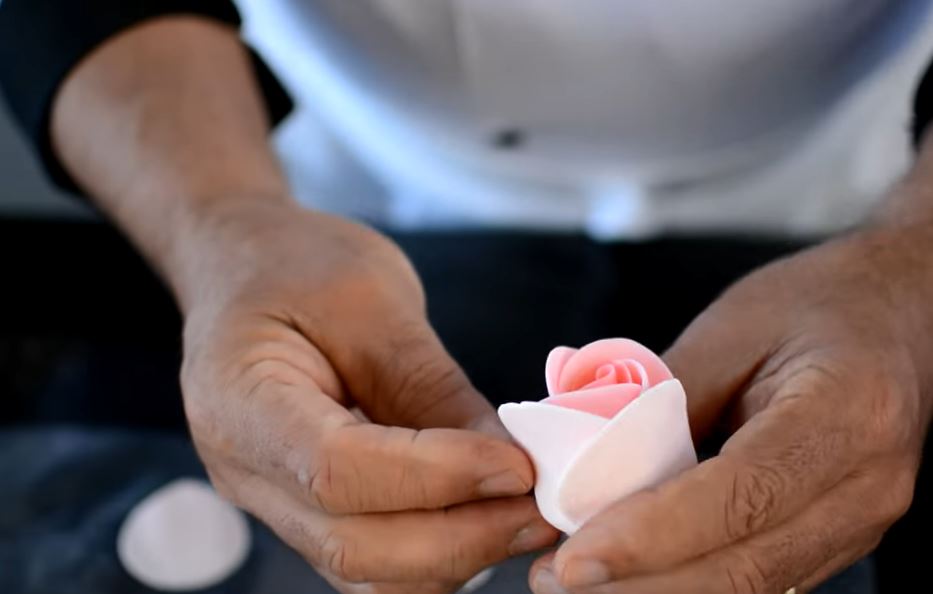
This is all that needs to make a rose: I have two colors of fondant – so I choose two colors because I’m gonna make a variety of different colors, I like to have multiple tones in one rose.
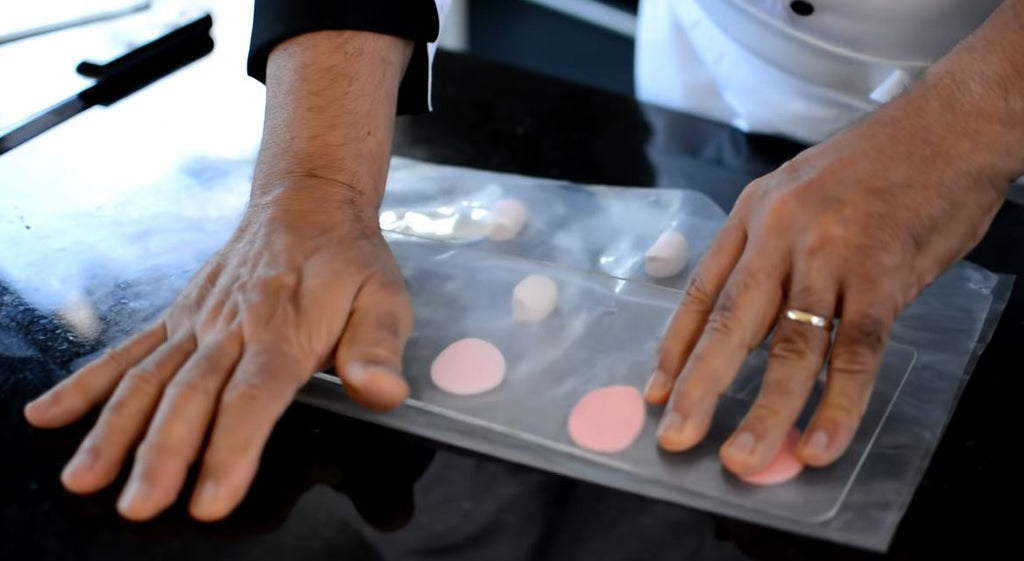
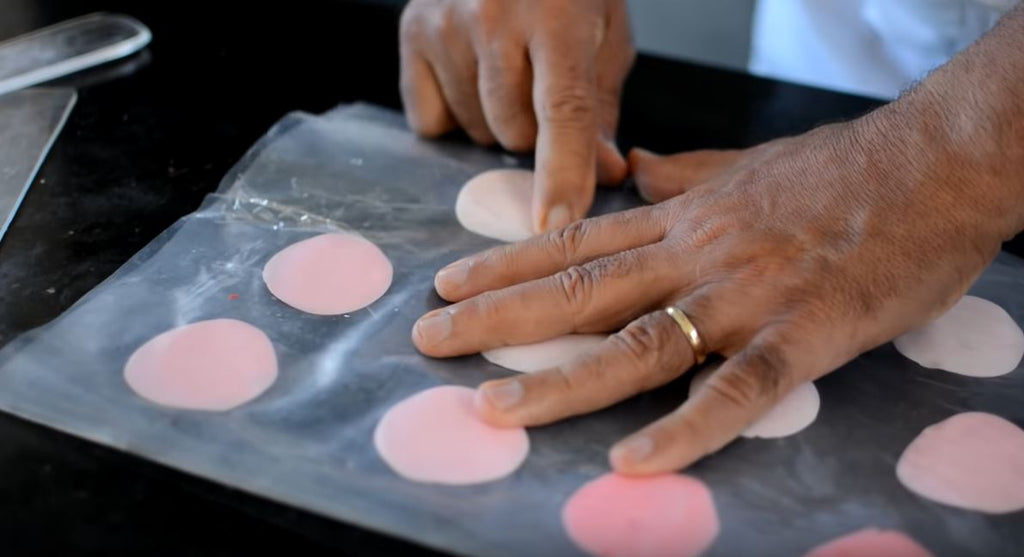
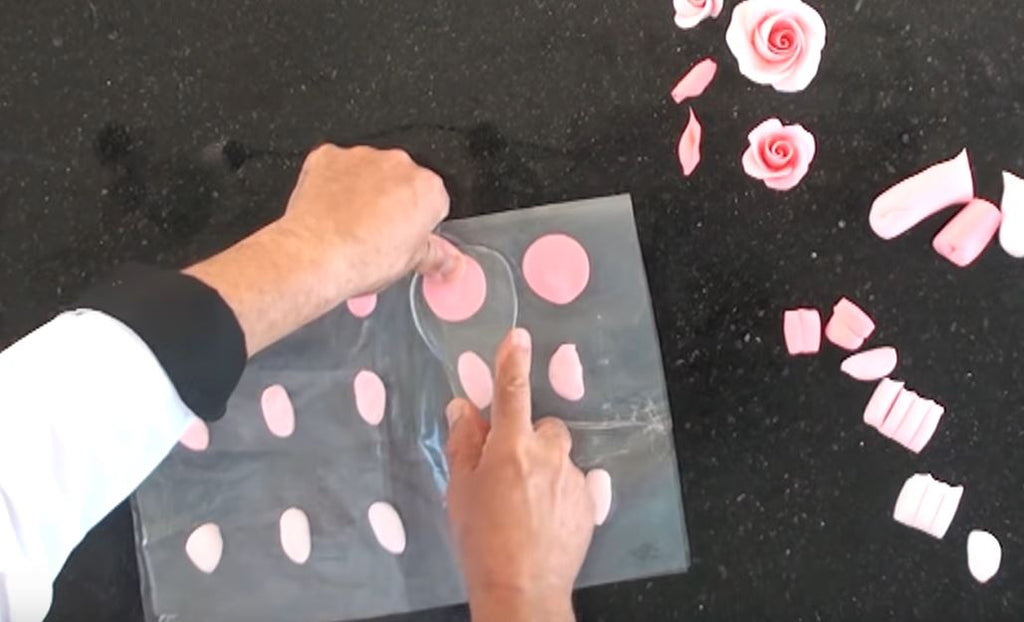
So I use Vizyon but this doesn’t mean that you cannot use anything else; so you can use your own favorite one. I have a plastic bag here – a simple plastic bag. I want to have the plastic bag open in one side. Alright, like that. It’s like a page. Like this will be perfect. Alright.
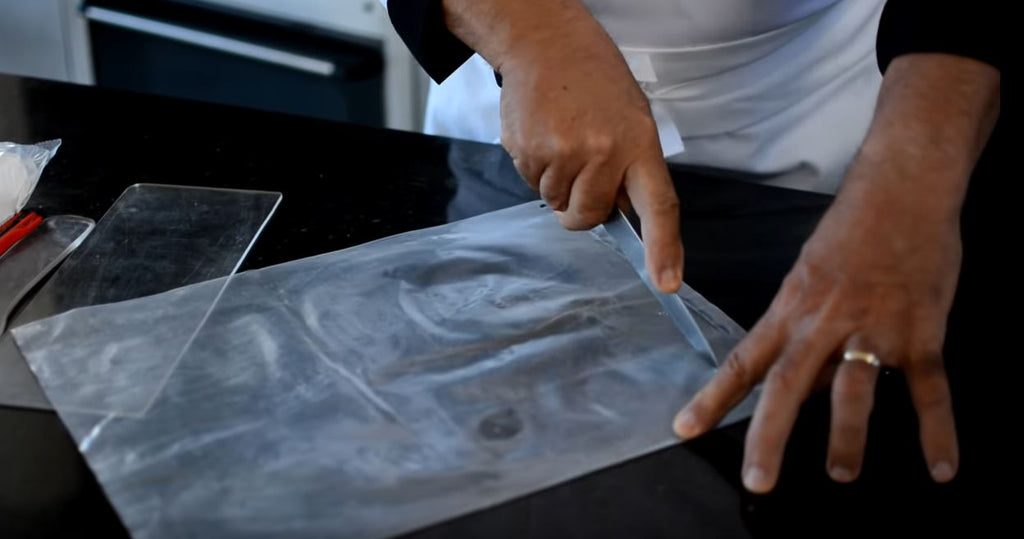
I have a transparent pusher. In these two formats, I will show you.
This is what you can use. But I prefer this one because I can push single petals at the time.
Alright.

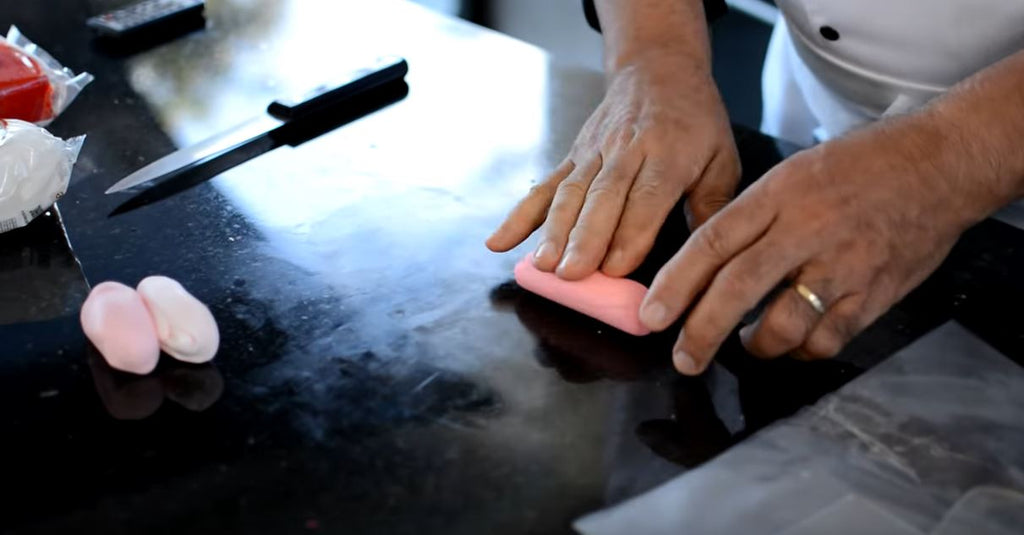
So, let’s get ready with the fondant. I have red fondant here. And I have a white here. Alright. So, I’m gonna take a little bit of red fondant and then create a pink fondant mixing with white. So this will be my base color. That is nice. So, today I’d like to make two,four and five-petal roses.
So, two in the center, in one color, which is this color. A little bit lighter color; four-petal on the side. This is the second layer and after that, I’m gonna make another 5-petal outside. Okay. I want to take this one, this much. And this one, this much. Gonna make the second tone.
Okay. Let’s see how this. The second one. Okay. And then the third layer, even lighter than this. Just a little bit. Almost white.
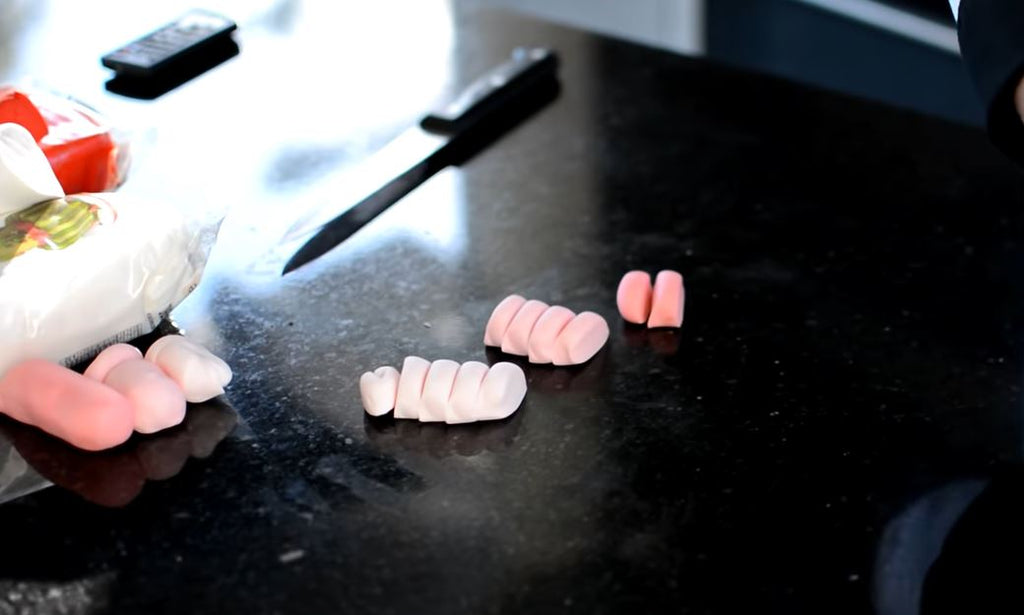
Okay, we are ready. So, these are the three colors we need. Alright. So, I’m gonna roll this. Just about like broomstick size. That’s the one. Second one. And the third one. Two pieces from the first one. One and two. Four pieces from the second one. One, two, three, and four.
And after that, five pieces for the outer petals. Two. Three. Don’t take this one. One, two, three, four. That we can take, no problem. Alright.
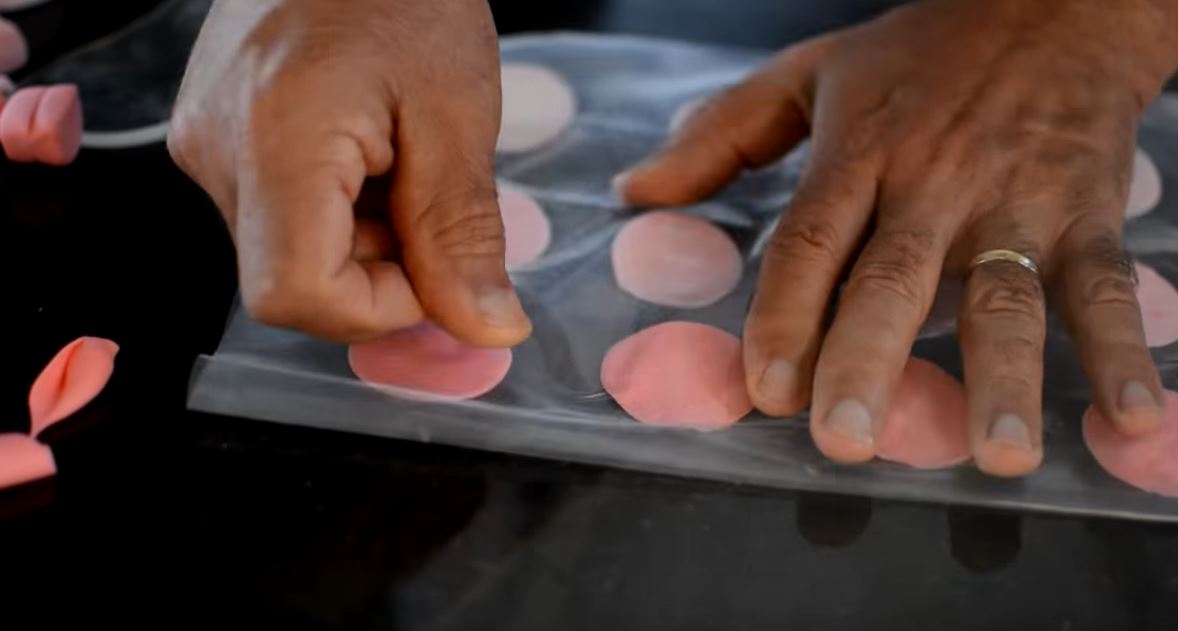
I’d like to do all the petals – all in once, not one by one. Okay, so one and two.
One, two, three, four. And one, two, three, four, five.
As you see, I’m not really worried about all of the positioning. Make sure that there’s enough space in between; maybe just put four here and then four here. It will be easier to do. Alright. And then, close it.
So you can use, as I said, this. But you need something with a little bit more power, a little bit more to do that. So, that’s why individually done like this is much more easier because, with this one, I can turn left and right.
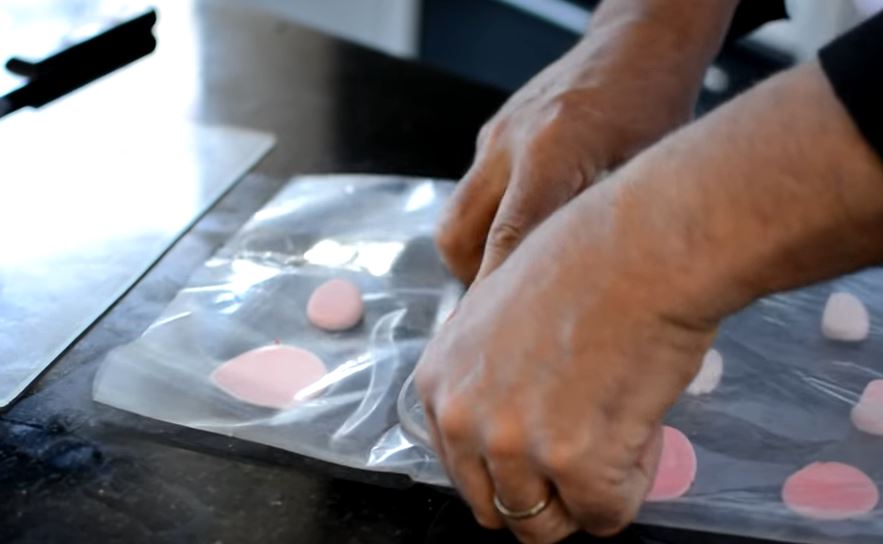
So what is this? About five millimeter Perspex sheets just like a spoon shape. If you can do that yourself, you will use it for years long. I made this one many years ago and it never breaks.

So, as you see, that’s a zero here, but anywhere else is not zero so I have to direct my finger around. Just glide my finger around to make everywhere the same thickness. As thin as possible.
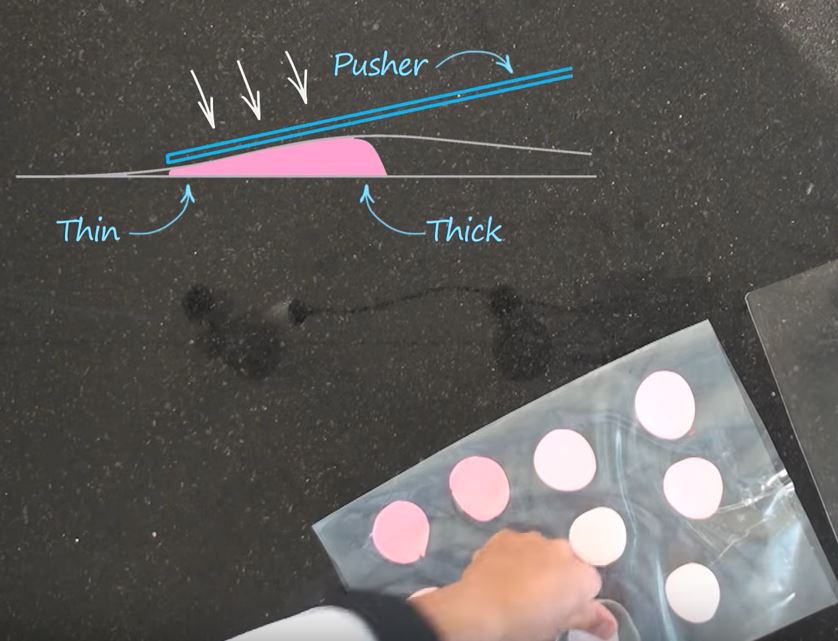
The trick is, the thicker part here will construct the rose into the right shape. So that’s why I’m not touching the back part. Okay. Open. Turn around. Open again. Push it back.
Turn around. Watch this. First, turning. Before finish turning, push this one in. So that is the first two-piece. The second row will be four. So the second color is this color. One. Two. Three. And four. Make sure you’re your balancing is equally distributed around. Don’t touch the top. Just touch the bottom a little bit, keep it cylindrical shape.
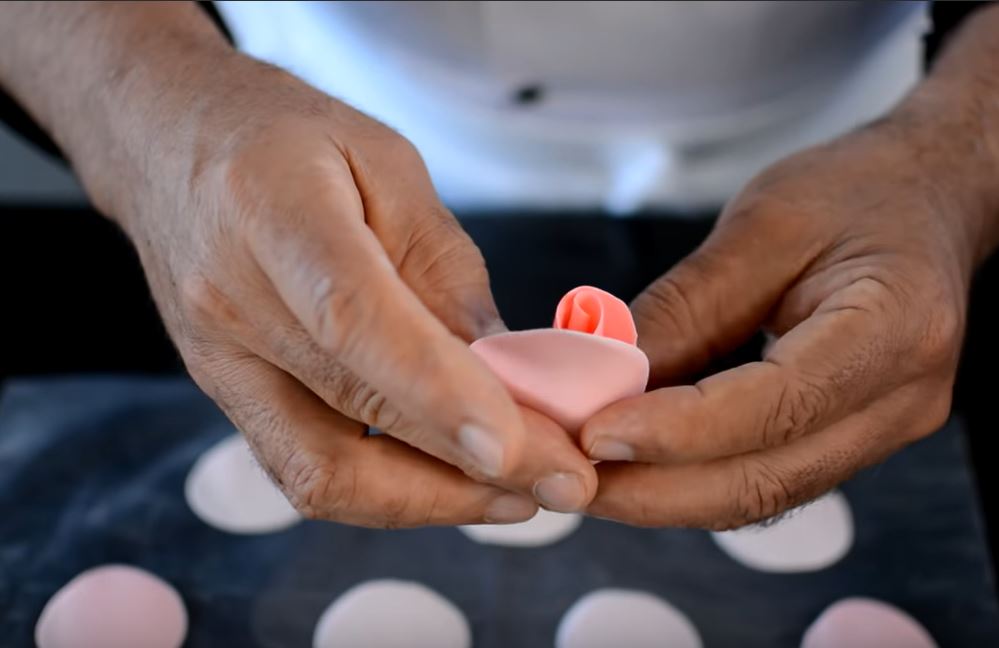
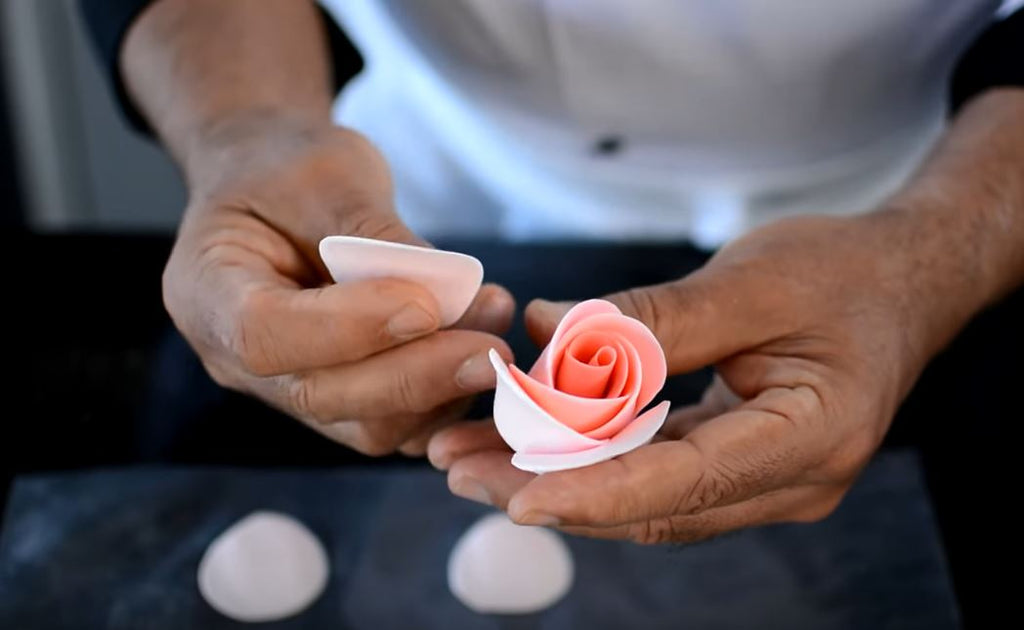
So, now the outer layer. One. I’m trying to stay in the same height or the outer level a little bit more higher. Because the one we squish in the middle, the center will pop out. Three. Four. And five. Alright. Now watch me. Four fingers, two fingers here. Two fingers here.

Manipulate the rose by squishing a little bit at the time. So when I see this one goes too much, I squish the other side, and it will centralize it.
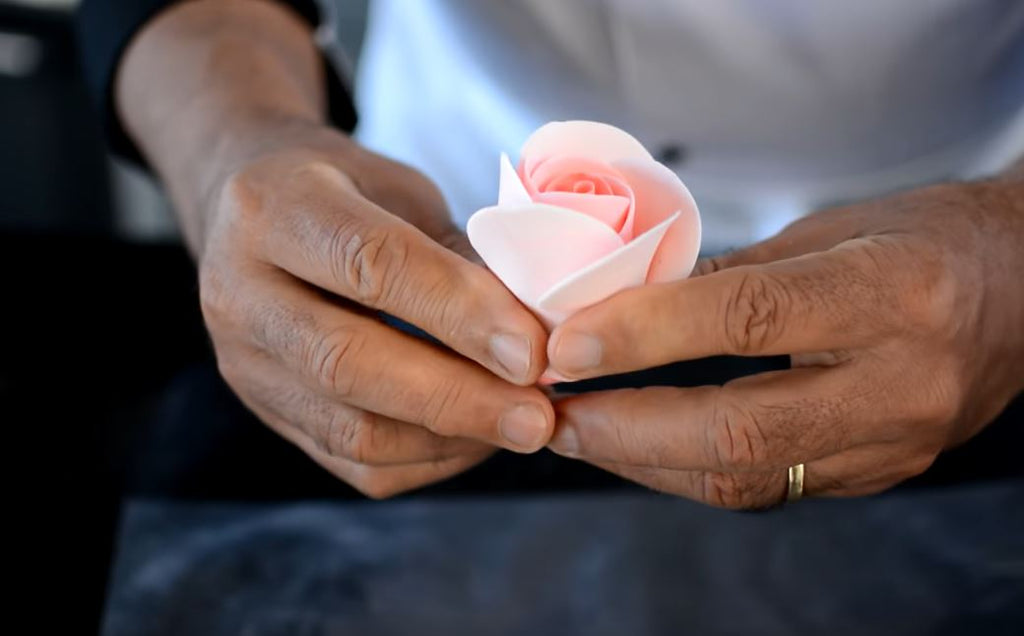
Okay, now. Watch this. My finger has these little corners here. So, I’m pushing here and doing this. You can also do it like that, no problem. One and two. One and two. One and two. So, this rose is done two (2) minutes or a maximum of three (3) minutes.
I couldn’t stop myself, I did a couple of more. So I’d like to show you more, maybe some small ones that you can see also.
So, again. We’re just rolling like a broomstick size, a little bit larger than the broomstick size. Okay. You don’t have to worry about this fondant because it doesn’t dry too quickly. This Vizyon fondant. So, I’m just gonna leave it in room temperature like this, I don’t worry about it getting dry or something. Alright. So, a couple more slices. You don’t have to worry too much about the size of the slices – just about one (1) centimeter is good enough. Alright.
So, let’s do now a couple more small ones. This is one. And two. And then four around. One. Two. Three. And four. Okay. This is two-four. One. And three. A variety of sizes can be achieved just by manipulating numbers of petals. Not the size of the petals. Alright. I want to show you this. Look at that.
One single petal, nothing else but just pushing one side down and turning around. That will match the end of the arrangement. Like, let’s say one here. One there. And one there. Okay, just like this, and you have smaller roses on this side. You can even chop this one from one side, slightly in the angle while the rose is quite soft. Alright. So you can place it like that. Alright. And after that, you can maybe just put like this. Alright, and this one here. Imagine it with that leaves and branches around.
And this is the end of the branch. Maybe just go to the other side like that. And this is here. So, it’s up to you. Again, this one, we can also chop a little bit. I always do that, I chop a little bit to make the rose sit at the right angle. Look at that. Let me show you how to do this.
I’m putting here. Just take a knife, a palette knife. The spatula also can do. Just push it like that. If you use a plastic knife, you can do it in once because a plastic knife doesn’t really stick on that side.
Just turning around like that. Look at that, that’s ready to use. Alright, and you can also chop this if you like.
So these are my very simple roses you can do it in no time and you can use it for an expensive cake.
Thanks for watching it again. And if you like this video, please like and subscribe to my channel. And there’s a lot more to come till to the next one. Bye for now.
You can also watch this video on Youtube.
Leave a comment